How to Build Something like THIS
Are you a genius?
No, I'm not. You're probably not (unless you're Aristoteles, for example). But I'm trained in two things:
- Finding knowledge fast.
- Understanding kownledge fast.
With those two things is how I built this "digital garden". It's not hard, really. But you need to know a bit about IT, of course. That's why we are here (remember 2 The only truth)
Short: I used Obsidian.
Long: read the rest.
What's Obsidian
Obsidian is a note-taking and personal knowledge management app. It's like Notion, but better (for some things). One of those things is that everything is plain text. Markdown. Stored locally, in something called vault.
You can make something that sounds extremely fancy called a digital brain. Each note is a node, connected to other notes that relate between each other through links, tags and optionally folders.
Oh, there is also a nice graph view of your notes (this is not mine):
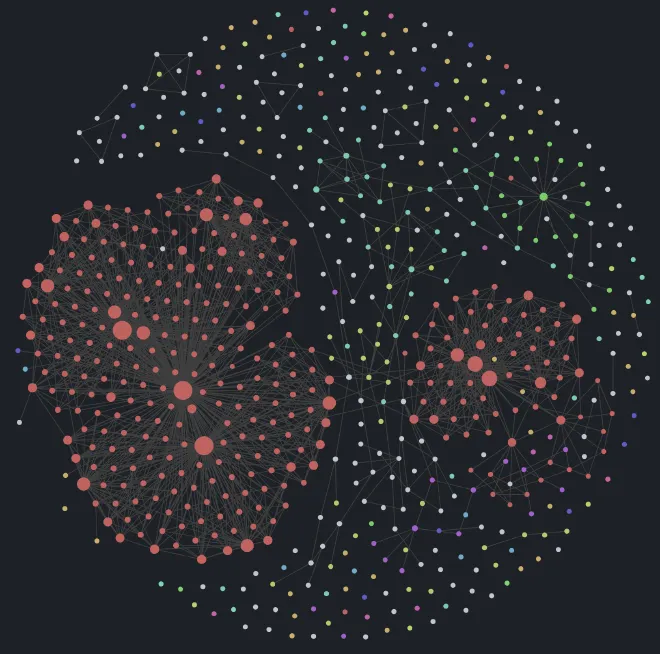
I'm not that fancy. I use it to store some links, notes and knowledge. The unorganised yet organised meta game of obsidian is perfect to make the (also fancy term) digital garden concept.
Download from here: Obsidian
ROCKET IT (ONLINE)
There are many ways to deploy obsidian notes. You can find some of them at the end of the post. The one I used (for the two reasons I mentioned before) is the Obsidian Digital Garden plugin (<- download here.) I might move out from this plugin in the future, when I'm learning something new.
You can quickly find a way to deploy it on Vercel following their guide. I don't like Vercel for many reasons that might grow with this garden. But I DO LIKE CLOUDFLARE.
The basics.
As they're basic, I'll just list them. Anyone can do this. Or Google it. Or LLM it.
- You already installed Obsidian and the Digital Garden plugin, no?
- Create a GitHub account
- Create a Cloudflare account (I DO LIKE CLOUDFLARE)
- Go to this repository, click “Use this Template,” and select “Create a new repository“ (private better, up to you)
- Create a Github access token for your repo
- Repository Access: Your repo created above
- Repository Permissions:
- Contents: Read and write
- Pull Request: Read and write
- Go to Obsidian > Settings > Digital Garden plugin > Paste the Github token there (along with the repo name from step 4 and your username)
We can start adding pages to be published. We do this by adding specific properties to every page we want to publish, and while there are several properties you can use to configure your pages, there are two that are required for you to have a functioning site.
dg-home- You need exactly one page with this property set to True (or with a checked box).
- This sets the home page for your site, and you can’t have two home pages.
- You need exactly one page with this property set to True (or with a checked box).
dg-publish- You need this set to True on every page you wish to publish
I you do not see a "Properties" section at the top of your page there are several ways to do it, the easiest being clicking the three-dot menu at the top right, and selecting “Add Property”
The Cloudflare thing
Let's create our APP:
- Login to Cloudflare
- Expand the left menu APP
- Expand Workers and Pages > Overview
- Click: Create Application
- Connect to your Github account > select the repo you created
Let's deploy:
- Enter the project name (you can change the default one)
- Production branch: Main
- Framework: Eleventy
- Build command:
npm ci && npm run build - Build output directory: dist
- Done.
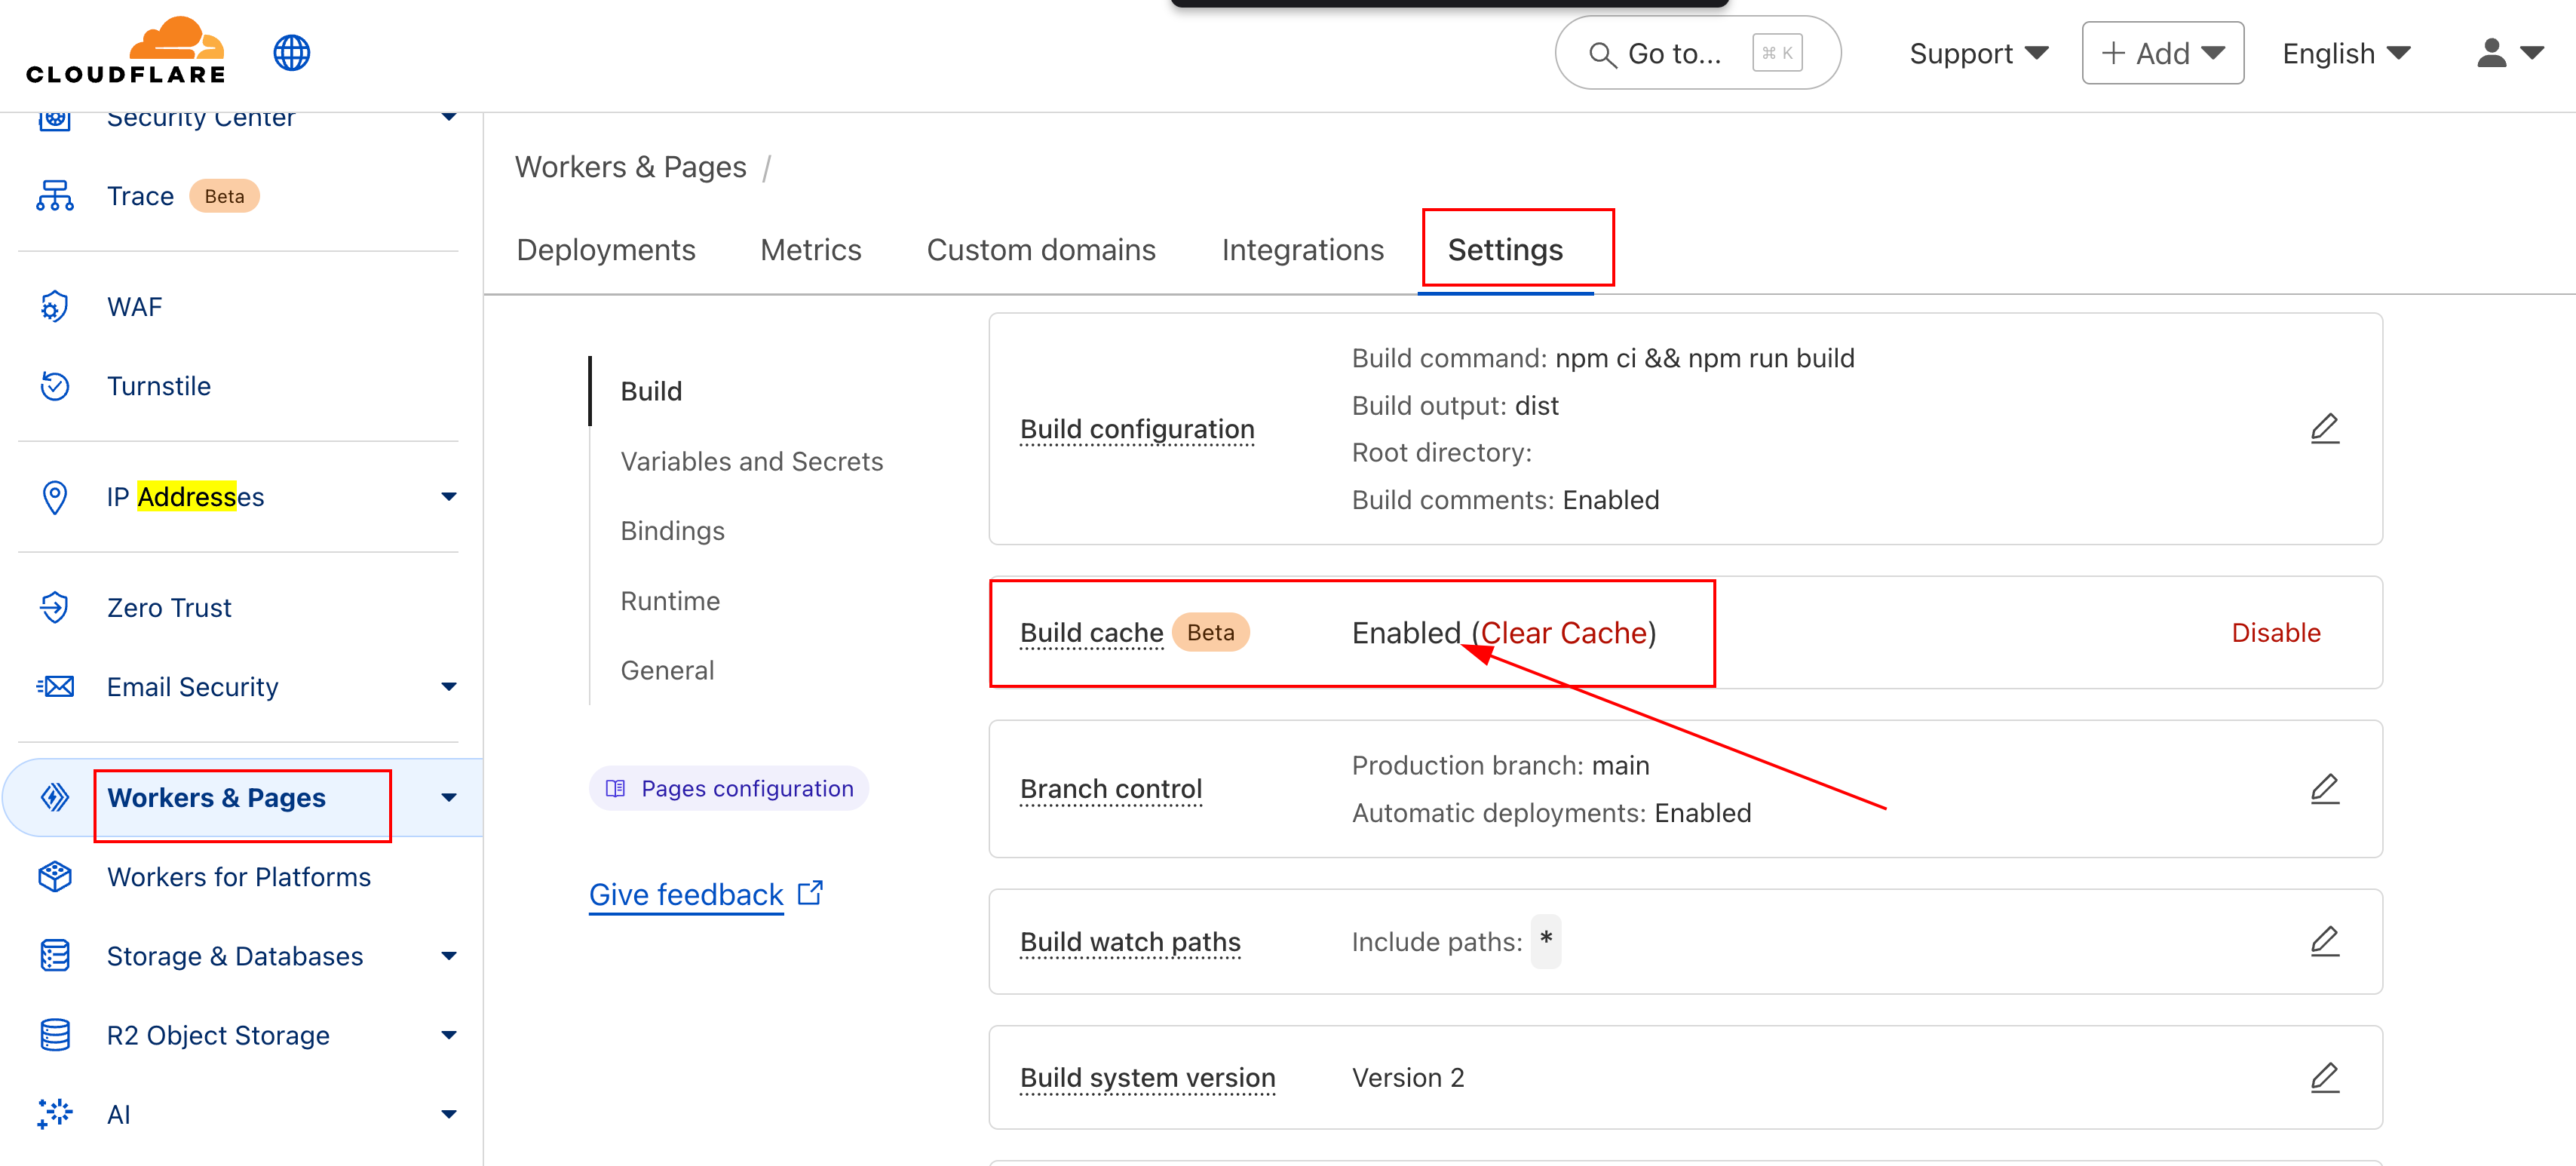
Kinda Important
The NPM registry is rate-limiting per IP some packages. It's not really severe but it can fail to deploy. For that reason we want to enable cache. With it we won't download the dependencies every time we deploy. This is a bit experimental, as everything in this garden:
Custom Domain Configuration
You will probably want to have a custom domain. For that, go to Domain Registration > Register Domains. You can always use another domain but IMO Cloudflare is not that expensive for what they offered. I got my domain for 10.44$ a year, being .com and not a shady one like .xyz.
Then, inside your Application you need to associate the garden to your Custom Domain. It might take a while to update the DNS records. If your browser cannot access it, you will need to flush your local DNS cache (sudo systemd-resolve --flush-caches on Linux).
It's also interesting to disable the access from your *.dev domain, so it's just accessible from the one you purchased before. There are a few ways to do this but we will keep it simple, we will use a redirect.
I don't like the idea of changing the code to redirect directly from the controller side, it should be done from Cloudflare itself:
- From the left panel, choose
Bulk Redirects - Create a bulk redirect rule. It's pretty intuitive and straight forward. You have 15 rules, just one is needed; redirect your
*.pages.devto your custom domain one
After this, any time someone (even you) accesses the pages.dev page, it will be redirected to the public domain one. Dirty, but useful.
Tip
In yourDeploymentspage there is always al link with thecommit_hash.site_name.pages.dev
You can always access from there, although of course you can always enforce a custom rule to keep it redirected, as done above
IMPORTANT
With this, you will have a basic setup for deploying your Obsidian notes into Cloudflare. But there are more things to be done.
Cybersecurity, Obsidian configuration... You know. These kind of nerdy things.
This is a Digital Garden so that will come in another note:
How to Configure Something Like THIS
Or yet another one, for cybersecurity:
How to Shield something Like THIS
P.S. Important ⬆️